Room Effects#
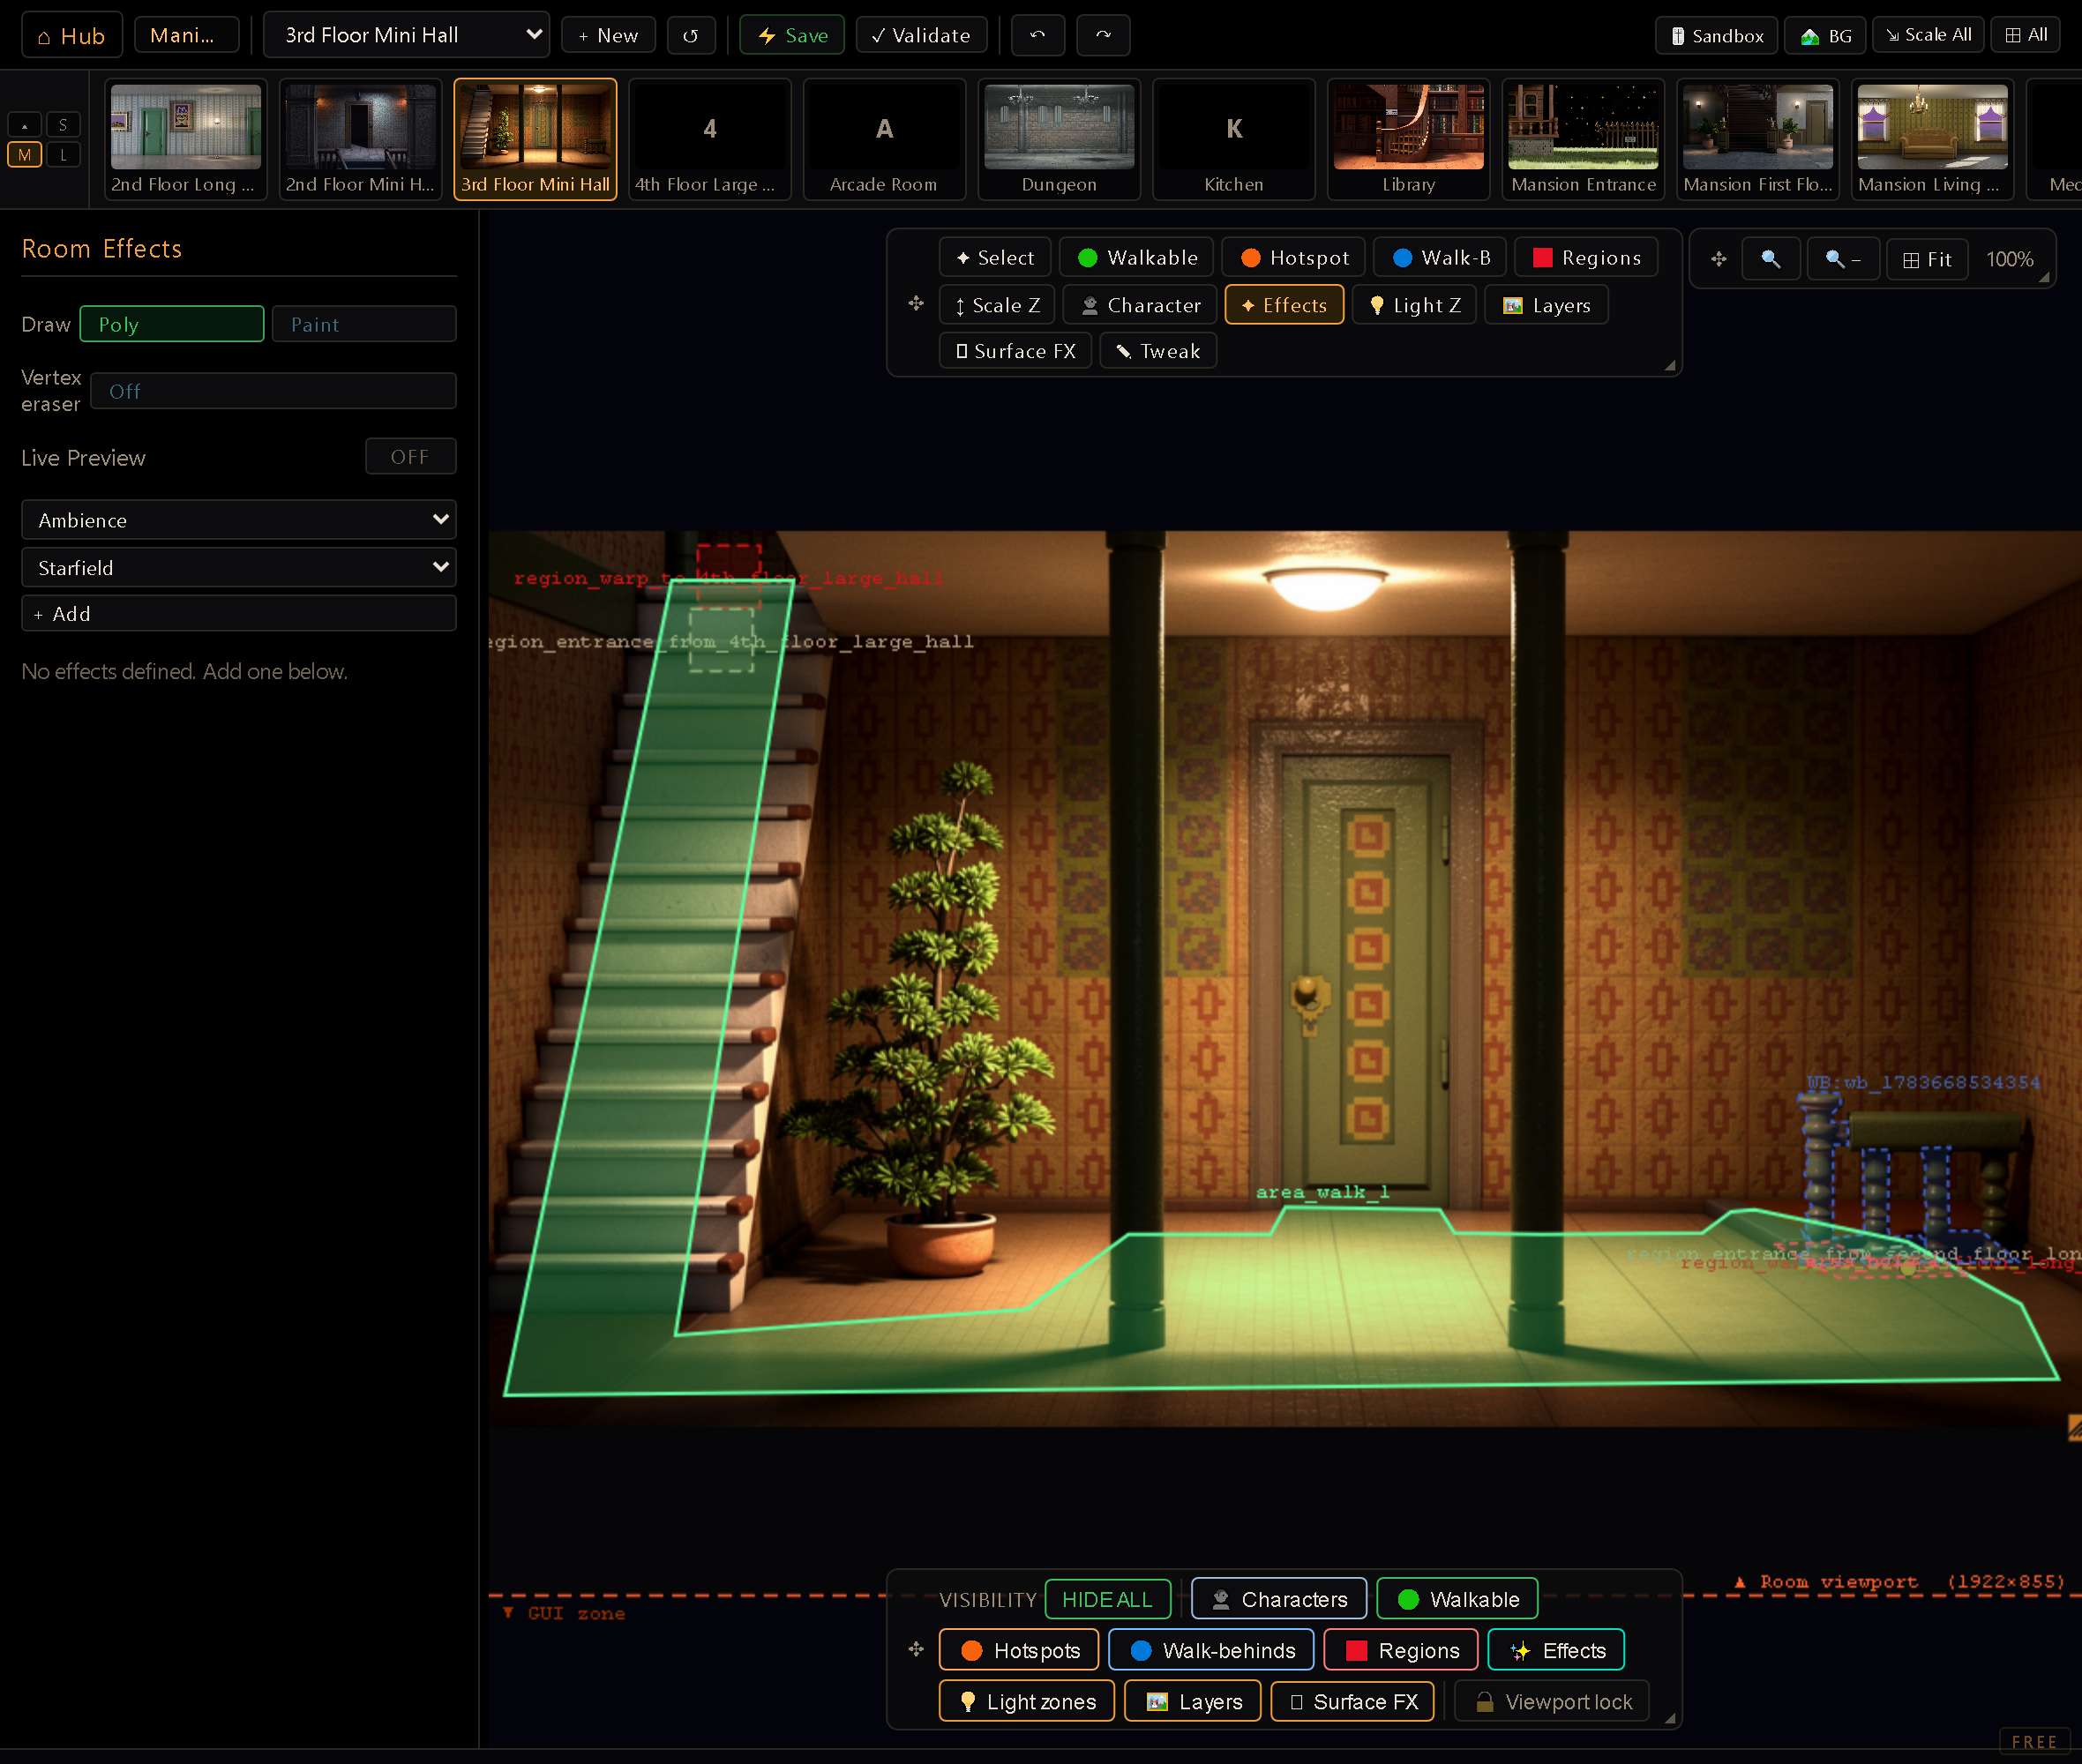
A room can carry its own weather, light, and screen effects — rain against a window, a
flickering TV in the corner, a lamp's glow, a distant lightning storm. The Room Effects
panel is where you build that list: pick a type, drop it into the room, and tune it live.
You reach it from the Room Editor's tools dock — the Effects tool (shortcut E).
Adding an effect#
Pick a category, then a type within it, and hit Add — the new effect drops into the room's effect list with its own default parameters, ready to select and tune. A room can hold as many effects as you like, including several of the same type (two rain layers at different speeds, for instance); each one is edited and removed independently from the list.
Effects sit still in the editor canvas until you turn on Live Preview — flip it on and a real animation clock starts, so rain actually falls and the starfield actually twinkles while you dial in parameters; turn it off to go back to a static, cheaper-to-edit view.
The four categories#
- Lights — Glow (a soft pulsing point cluster), Spotlight (an aimable cone of light that punches through the scene like a real light source), Fire (a looping flame sprite-sheet).
- Ambience — Starfield, Clouds, Vignette (a darkened frame around the screen edge), Colorwash (a full-screen tint), Fog, Blur / Defocus, Water Jet (a ballistic stream of droplets fired from a nozzle — dial pressure and velocity and the same effect reads as a dribbling faucet, a garden hose or a fountain; no art needed).
- Weather — Rain, Rain Splash (floor ripples — its own effect; add one and draw its zone over the wet floor for the splash-on-impact look), Snow, Lightning, Bolt (a procedural jagged strike).
- Screens — Screen / TV (scanlines, tearing, static, and RGB-split for an in-world monitor or television).
Two of these can run on art you supply instead of the built-in look: Clouds takes a seamless tile and Fire a sprite-sheet, each with its own field and a one-click PNG import.
Give your own cloud tile room to breathe. A cloud tile is stretched to fill whatever band or region you gave the effect, so a short image spread over a tall sky can show faint horizontal steps where the gradient runs out of shades. Export it at a comfortable height for the area it has to cover and the banding disappears. The built-in clouds handle this for you — it only comes up with your own art.
Where an effect lives: screen, region, or point#
Every effect places itself one of three ways:
- Full-screen overlay — Vignette, Colorwash, and Fog have no shape to place; they simply wash over the visible screen.
- A region — most of the rest (Starfield, Clouds, Glow, Rain, Rain Splash, Snow, Bolt, Screen/TV, Blur) can be left to fill the whole room, or confined to a polygon you draw on the canvas — the same click-to-place, drag-to-reshape gestures used by every other polygon in the Room Editor (walkable areas, hotspots, regions…). Draw a region to keep rain inside a window frame, confine a glow to a lamp's reach, or fence a TV's static to its own screen; clear it to go back to filling the room.
- A point — Spotlight, Fire and Water Jet are placed at a single origin instead of an area: drag directly on the canvas to move it. Spotlight also has an aim handle — drag it to set the cone's angle and length; Water Jet draws a dashed direction tick so you can read its Angle fader right on the canvas.
In front of or behind your characters#
Every effect is drawn either behind the characters — they walk in front of it and cover it — or in front of them, painting over everyone. Positioned effects (Glow, Spotlight, Fire, Rain Splash, Water Jet, Bolt, Starfield, Clouds, Screen/TV, Blur, and far-mode Lightning) expose a Layer choice right under the effect list:
- Behind — characters occlude it. A campfire against the back wall, a glow on a lamp your cast can walk past, a TV on the far side of the room.
- In front — paints over characters. A brazier in the foreground, a spotlight beam that catches whoever steps into it.
Each type opens on the default it always had — Fire and Spotlight in front, Glow and Starfield behind — so a room you never re-layer looks exactly as it did before.
Full-screen ambience (Vignette, Colorwash, Fog, Rain, Snow) has no Layer choice: "behind the characters" means nothing for a wash that covers the whole viewport. Near-mode Lightning is the same — its flash is a screen-wide flood by design.
Blur is the one type where the choice changes what it blurs, not just where it lands: in front blurs everything painted in the region, characters included; behind blurs only the room art. Screen / TV works the same way with its tearing and RGB-split — it distorts whatever is already on screen underneath it.
Letting the character decide: the depth line#
"Behind" and "In front" are absolute — the effect is on one side of every character. For a campfire your cast should be able to walk both in front of and behind, positioned effects offer a third choice: By depth. Pick it and the effect gets a depth line across the room:
Anyone standing below the line passes in front of the effect. Anyone above it is drawn behind. Two characters, one line, opposite sides.
The line shows up on the canvas as a dashed horizontal bar with a round handle — drag it to place it, exactly like a walk-behind's baseline. Every depth-mode effect shows its line, not just the selected one, so you can place a character by eye against them. The panel's Depth line Y field does the same job in numbers, and 0 means automatic: the line is derived from where the effect already sits (the bottom of its region, or a point effect's own origin), which is a sane starting point to drag from.
Feet exactly on the line count as in front — the same edge rule walk-behinds use.
Bolt and Lightning are the two positioned types with no depth mode: their flash is a screen-wide flood, so a depth line would only describe half of the effect.
Blur and Screen / TV in depth mode are worth calling out, because they distort what's beneath them rather than just painting on top: on the depth line they take in the room art plus any character standing above the line, and leave the ones below it untouched. A defocused doorway blurs whoever is back there while your foreground character stays sharp — one effect, no second copy.
One thing worth knowing: depth mode isn't a synonym for "behind". The effect is drawn among the characters, which is a slightly later moment in the frame than the "Behind" layer — so it paints over the characters' ground shadows even when its line sits above everyone.
Ordering effects within a layer#
The ▲▼ buttons on each row of the effect list move an effect up or down: ▲ draws it further back, ▼ further front. Two glows stacked on the same lamp, a fog band over a colorwash — the list order decides which one wins.
That order only settles ties within one layer. Across layers the layer always wins: an effect set to "behind" can never cover one set to "in front", however far down the list it sits.
Turning an effect on and off during play#
Every effect carries a Reactive visibility condition. Leave it on — always — and the effect simply draws, the way it always has. Give it a condition and the effect only draws while that condition holds — the fire lit once the player strikes the match, the glitch that starts when the machine breaks, the fog that lifts after Act 2.
It's the same condition builder used by puzzle rules, hotspot reactions and
room layers — a flag check, a comparison, or all / any / not nested
as deep as you need — so there's one idea to learn, not one per panel. The usual switch is a
flag: gate the effect on storm_over, then SETFLAG:storm_over from any rule, reaction,
dialogue choice or cutscene step. Because the state lives in the flag, it survives a save
and re-entering the room for free, and one flag can drive several effects at once.
The condition is checked every frame, so an effect comes back the moment its condition holds again — there's nothing to re-trigger on room entry.
In the editor it always draws. The panel shows you the effect whatever your flags say — you have to see what you're authoring. The same is true of the layers panel; the condition is a runtime gate, not an editor preview switch.
Bolt & Lightning: screen vs. region flashes#
Lightning has two modes: Near (a full-screen flash for a close strike) and Far (a soft, auto-firing glow on a cloud band, always confined to a region). Near-mode Lightning and Bolt (which only strikes near) both add a Flash area choice:
- Full screen (the default) — the flash floods the whole visible screen, the way a real strike would light up a room from outside.
- Region only — the flash is clipped to a polygon you draw instead, for a storm seen through one window or doorway rather than lighting the whole scene. Choosing it arms the same vertex tool used everywhere else; leaving the region empty falls back to full screen.
Bolt draws the visible jagged strike itself; sync a Bolt and a Lightning effect by giving
them the same seed and gap timing so the flash and the strike read as one event. Neither
effect makes noise — pair a strike with thunder using a SOUND: effect token
in the room's rules.
Room Effects vs. Surface FX#
The Room Editor has two FX-shaped tools, and it's easy to mix them up:
- Surface FX is a single room-wide setup: one light direction that casts every character's shadow, plus a short list of reflection surfaces (puddles, mirrors, background echoes, and water that ripples in place). It's about how the room's own surfaces and characters interact with light. Its shadows and each reflection zone take the same Reactive visibility condition described below, so they can be switched off mid-game too.
- Room Effects is an open-ended list of decorative atmosphere — weather, glow, screen effects — layered over or behind the scene. It isn't tied to characters or surfaces at all; add or remove as many entries as the room needs.
Workflow#
- Switch to the Effects tool (
E) in the Room Editor. - Pick a category and type, then Add.
- Select the new entry from the list and tune its parameters in the panel below.
- For a region-capable type, draw a polygon on the canvas to confine it (optional — skip to fill the room/screen).
- Set Layer if the effect should sit on the other side of your characters — or By depth, then drag its line on the canvas. Use ▲▼ on the list rows to order effects that share a layer.
- For Bolt or near-mode Lightning, choose Full screen or Region only for the flash.
- Turn on Live Preview to check the effect in motion, then Save the room.